

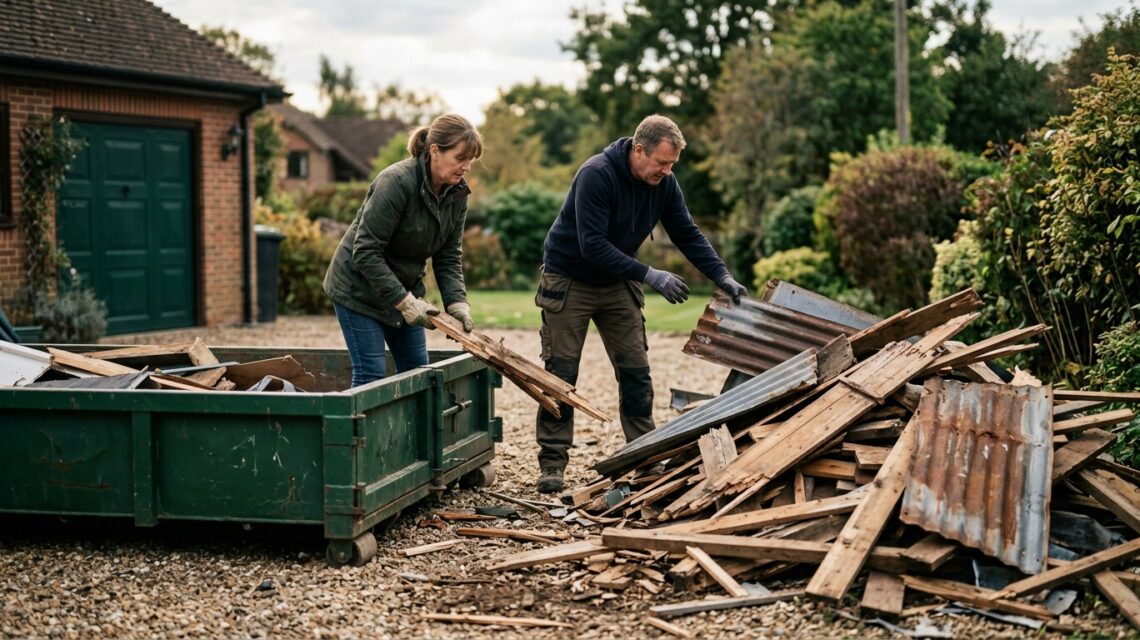
That leaning, rotted shed in your backyard isn’t going to tear itself down. Shed demolition looks simple until you’re staring at a pile of splintered wood, rusted nails, and old shingles with nowhere to put it all. The teardown’s only half the job. Getting the debris off your property is where most homeowners stall. This guide walks you through a safe, systematic approach to dropping that structure and clearing the site fast, with the right dumpster size to haul every last board away.
What to Know Before You Start Shed Demolition
Before you swing a single hammer, slow down and plan. A few minutes of checking rules and utilities now saves you fines, injuries, or a stalled project later. That’s not caution for its own sake. It’s just common sense.
Permit and utility checks in Los Angeles
Los Angeles generally doesn’t require a permit to tear down a small, detached accessory structure, but the rule shifts based on square footage, proximity to property lines, and whether the shed is tied into electrical or plumbing systems. Always confirm with your local building department first rather than guessing. If your shed has a light fixture, outlet, or any water line running to it, get that service shut off and disconnected before demo starts. Cutting into a live wire with a saw blade is a bad way to spend an afternoon.
- Call your city’s building and safety office to confirm whether your shed’s size or setback triggers a permit requirement.
- Have the electrical panel breaker for the shed shut off and tag it so no one flips it back on mid-job.
- Locate and shut the water supply if the shed has a sink, spigot, or irrigation line running through it.
- Decide early whether the structure will be hand-demolished with basic tools or pulled down mechanically with a mini excavator or skid steer.
- Check with neighbors or an HOA if the shed sits close to a shared fence line, since falling debris can cross property boundaries fast.
Tools and safety gear checklist
Hand demolition is the common route for most backyard sheds, and it doesn’t take much equipment. Still, skipping safety gear is how a simple teardown turns into an ER visit. Gloves and goggles protect against splinters, rusty nails, and flying debris. A pry bar and sledgehammer handle siding and framing, while a circular saw makes quick work of larger panels or stubborn joints.
- Heavy-duty work gloves to guard against splinters, rusted nails, and sharp metal edges.
- Safety goggles or a face shield to protect your eyes from dust, debris, and flying wood chips.
- A flat pry bar and a claw hammer for separating siding panels and pulling nails cleanly.
- A sledgehammer for breaking apart framing, stubborn joints, and small foundation sections.
- A corded or battery-powered circular saw for cutting through larger beams and roof decking quickly.
- Sturdy boots with reinforced toes, since dropped lumber and nails are an everyday hazard on a teardown site.
One more thing worth deciding before you pick up a tool: where the debris is actually going. Figure out your container placement, driveway clearance, and loading path before teardown begins, not after the yard’s already full of broken lumber. If your shed is large or part of a bigger demolition project, reviewing yard dumpster dimensions ahead of time helps you confirm the container will actually fit your driveway or side yard. Planning this step backward, from debris to dumpster to teardown, keeps the whole job moving instead of stalling halfway through. Keep in mind the crew doing the actual teardown is yours to arrange; Green Star’s part is dropping the container you fill.
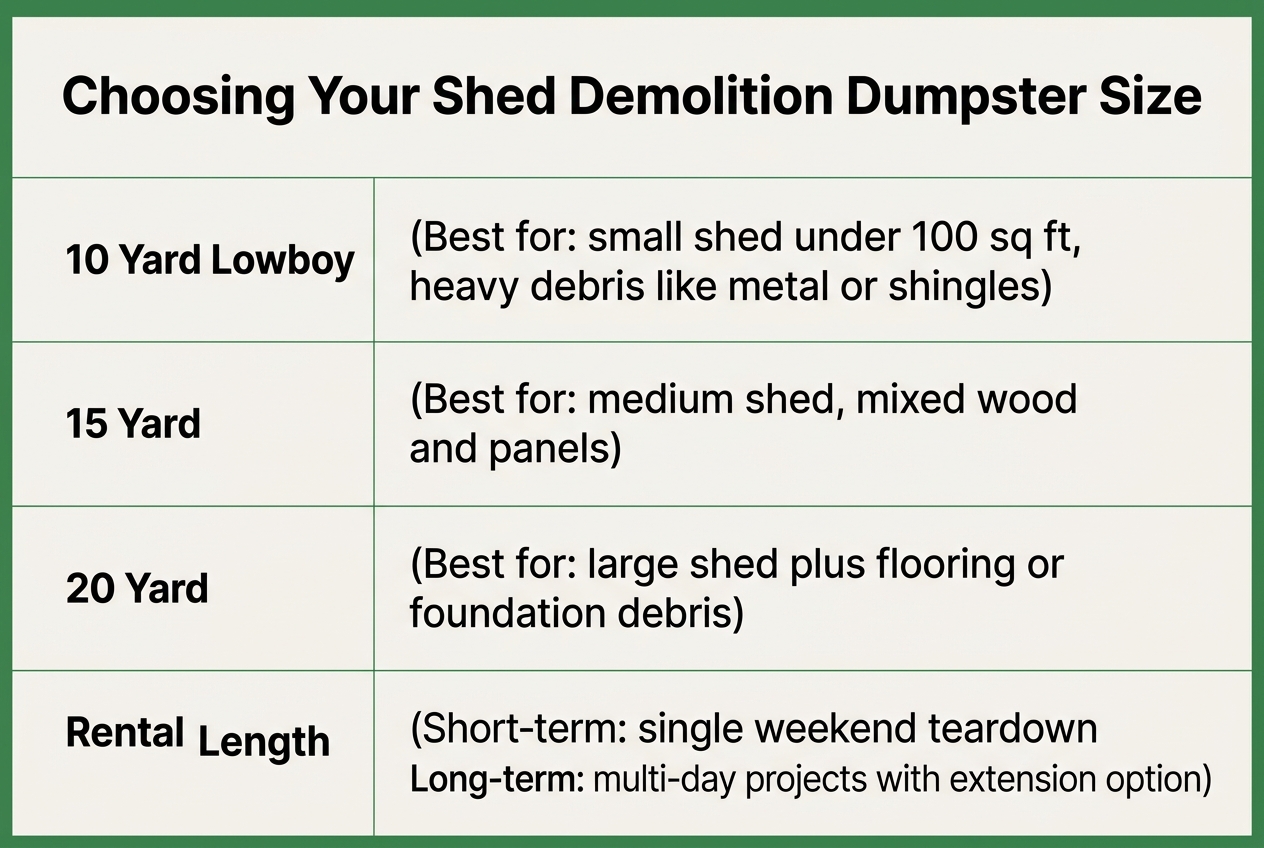
Choosing the Right Debris Container for Your Shed Size
Not every shed teardown produces the same pile. A tiny tool shed and a two-car storage barn don’t belong in the same container, and picking wrong costs you real money. The table below breaks down what typical shed types generate and which size handles it without tipping you into overage fees.
| Shed Type | Typical Size | Recommended Dumpster | Why It Fits |
|---|---|---|---|
| Small tool shed | Under 100 sq ft | 15 yard | Light wood debris, low weight, easy DIY loading |
| Mid-size storage shed | 100–200 sq ft | 20 yard | Handles wood siding, shingles, and trim together |
| Shed with concrete slab | Any size | 10 yard lowboy | Low walls, built for dense weight per yard |
| Large storage building | 200+ sq ft or multiple sheds | 30 yard | Extra volume for bulky framing and multiple structures |
A small shed under 100 square feet rarely fills more than a 15 yard container. It’s just not that much material. Step up to a 20 yard dumpster once you’re dealing with wood siding and shingles layered together, since that combination eats volume fast without weighing a ton.
Size comparison by shed type
Matching size to material is really about weight, not just space. A shed stuffed with old shingles can look small but weigh heavy, so don’t judge purely by footprint. Reviewing dumpster sizes against your shed’s square footage before you book saves a wasted swap later. If you’re tearing down more than one structure, or a large barn-style shed, the 30 yard gives you breathing room most single units don’t.
When to pick the 10 yard lowboy for concrete pads
Concrete flooring and heavy framing change the math entirely. A standard dumpster fills with air long before it hits its weight limit, which just wastes space you’re paying for. The 10 yard lowboy solves that: low walls, built for dense loads, priced flat at $600 for clean dirt or concrete. That’s the same logic contractors use when sequencing other site work, much like planning around heating installation timelines so heavy equipment doesn’t block a work zone. Guess wrong on weight, and you’ll eat $95 per extra ton. Guess right, and you pay once and move on.
Step 1: Clear the Shed and Sort Contents
Sorting keep, donate, and discard piles
Before any wall comes down, empty the shed completely. Every rake, paint tray, box of nails, and forgotten lawn chair needs to come out first. It’s tedious, sure, but working around a cluttered structure slows the teardown and raises the odds of someone getting hurt on debris you didn’t need to touch in the first place.
Once everything’s out, start three piles: keep, donate, and discard. Tools in decent shape, usable lumber, and functioning equipment can go back into use elsewhere on the property. Items too worn for your purposes but still functional, like an old wheelbarrow or hand tools, often find a second life through a local donation center or thrift shop. Everything left over, broken furniture, rotted boxes, rusted-through containers, heads to the discard pile. If your pile is modest, a 15 yard dumpster rental handles the cleanout load easily, while a 20 yard suits sheds that doubled as a storage catch-all for years. Think of it as a DIY-priced alternative to hiring a cleanout crew: you or your helpers do the loading, and the container does the hauling.
Flagging hazardous and recyclable materials
Hazardous materials need their own path entirely. Old paint cans, propane tanks, motor oil, pesticides, and solvents cannot go into a roll-off container, full stop. These require drop-off at a licensed hazmat facility, since they pose fire, chemical, or environmental risks that standard waste streams aren’t built to handle. Set them aside in a stable, upright area away from the main sorting zone until you can transport them properly.
Scrap metal deserves its own pile too. Hinges, fasteners, nails, and old tool brackets often have value to a local recycler willing to take mixed metal, so it’s worth routing that pile to a scrap buyer yourself rather than tossing it in the container. Separating it now saves sorting time later and keeps your dumpster weight down, which matters since additional weight fees run $95 per ton. For a broader sense of what size container fits your project once contents are cleared, learning the roll off dumpster sizes guide helps you avoid both underestimating and overpaying.
Step 2: Strip the Roof
Removing shingles versus metal roofing
Once the shed is cleared out, the roof is next. Shingles come off in layers, usually with a flat shovel or roofing fork, and they tend to crumble into small, gritty pieces that pile up fast. Metal panels behave differently. They come off in large, rigid sheets, often still attached by dozens of screws or nails, and they’re sharp along the edges. Roofing felt sits underneath either material and tears away in strips once the top layer is gone. Know your roofing type before you climb up, because the tools and pace change with each one.
Work from the ridge down. Starting at the peak and working toward the eaves keeps your weight on sections you’ve already loosened rather than ones still holding debris, which cuts down on slips. Pull nails and screws as you go, and keep that hardware away from your wood piles. Mixing nails into framing debris makes loading slower later and raises the odds of a puncture. For a broader walkthrough on sequencing this kind of teardown, it’s worth reading guidance on safely dismantling an old shed before you climb up.
Don’t let roof sections drop. Lower them by hand or slide them down a ramp to the ground. Dropped panels bend, shingles shatter wider, and either way you’ve made the debris harder to stack. A 20 yard dumpster rental handles most single-shed roofing loads without issue, while a 10 yard lowboy suits smaller setups with mixed asphalt and wood debris.
Step 3: Remove Siding and Doors
Once the roof’s gone, turn to the walls. Start at a corner seam and work a flat pry bar behind the first siding panel. It should pop loose with steady pressure, not force. Work one panel at a time, moving along the same course before starting the next row up or down. Nails bend, panels crack, and that’s fine. You’re not salvaging this stuff, you’re clearing it fast and safely, so don’t baby it.
Before the wall framing comes down, pull every door and window out of its frame. Doing this early matters. A door swinging loose on one hinge while you’re pulling studs is a hazard nobody needs. Set hardware aside if a neighbor or secondhand buyer might want it; otherwise it’s debris like everything else. Detaching doors and windows first also keeps your framing teardown in Step 4 cleaner, with fewer snagged materials and surprise swings.
Stack flat materials like siding sheets and panel scraps as you go rather than tossing them loose. Flat stacking saves real space in a container, sometimes 20 to 30 percent compared to a jumbled pile. That matters on a tight budget, since a fuller load means fewer trips and lower weight fees. If you’re sizing a dumpster for a whole shed teardown, data from state solid-waste studies on construction and demolition debris volumes gives a useful sense of how bulky even a small structure’s materials can get.
Handling windows and glass safely
Glass needs its own pile, period. Mixing broken panes into a stack of wood scraps is how someone gets a deep cut while loading later. Pull window units whole if you can, then set them on a tarp away from foot traffic. If a pane’s already cracked, tape an X across it before handling. That keeps shards together instead of scattering across your work area.
When it’s time to break glass down for disposal, wear gloves and eye protection, and bag small fragments separately from the frame material. Wood and vinyl frames can go in with general siding debris. Keep glass wrapped and clearly marked so whoever loads the container, you, a helper, or a contractor, knows exactly what they’re handling. A 15 or 20 yard residential dumpster rental handles mixed shed debris like this comfortably, and all-inclusive pricing means a few bagged glass scraps won’t trigger surprise fees at pickup.
Step 4: Take Down the Framing and Foundation
With the roof and siding gone, you’re left with a bare skeleton and whatever the shed sits on. This is where the real muscle work happens, but it’s also the most predictable part of the job. Work in order, stay patient, and the frame comes down safely.
Cutting framing into manageable pieces
Don’t try to topple the whole frame at once. That’s how you end up with a wall section pinning a tool or worse, a foot. Knock out wall studs section by section, working from one corner across to the next, and let each piece fall in a cleared zone. Once studs are down, cut the longer pieces into shorter lengths with a reciprocating saw or circular saw. Four-foot sections lift easily into a dumpster; eight-foot studs don’t. A quick size reference helps crews plan loading:
| Framing Piece | Typical Length | Recommended Cut Length | Lift Difficulty |
|---|---|---|---|
| Wall stud | 8 ft | 4 ft | Easy, one person |
| Top/bottom plate | 8–10 ft | 3–4 ft | Moderate |
| Rafter or joist | 10–12 ft | 4 ft | Moderate to hard |
| Corner post | 8 ft | Leave whole or halve | Hard, two people |
Dealing with concrete slabs and footings
Many sheds sit on a concrete slab or a simple skid foundation. If it’s a slab, you’ll need to break it up with a sledgehammer or rented jackhammer before anything leaves the site. That teardown work is on you or your contractor; Green Star’s container just takes the broken-up result. Skid foundations, by contrast, often just need unbolting. Either way, concrete and dirt are heavy, dense, and unforgiving on equipment. That’s why you load heavy concrete and dirt into a 10 yard lowboy dumpster, which has low walls for easy wheelbarrow access and a weight capacity built for dense debris rather than bulky, lightweight waste. Reviewing regional volumes of demolition debris by zoning type shows just how much concrete and masonry outweighs framing material pound for pound. Clean dirt or concrete in a 10 or 15 yard lowboy runs a flat $600, separate from mixed debris pricing, so keep those materials sorted from wood and shingles.
Step 5: Load Debris and Schedule Pickup
Loading order for weight distribution.
Once the shed is down, loading smart matters as much as tearing it down right. Toss everything in randomly and you’ll end up with an unstable pile, wasted space, and possibly a surcharge. Weight distribution is the goal. Load with purpose, and the container stays safe to transport and easy to fill efficiently.
- Load heaviest, densest materials first, such as foundation blocks, nails-in lumber, or metal framing, so the weight settles low and keeps the container balanced during transport.
- Break down bulky pieces like wall sections, doors, and long framing boards into smaller chunks, since flat, compact debris stacks far tighter than awkward, bent shapes.
- Fill gaps with lighter debris, such as shingles or insulation scraps, to use up dead space instead of leaving pockets of air.
- Stop loading at the fill line marked on the container, since anything stacked above it usually isn’t allowed to leave the yard and can trigger extra charges.
- Keep a rough tally of weight as you go, especially with concrete or dirt, since a 10 yard lowboy is priced for a flat rate but heavier mixed debris can tip into per-ton fees.
- Call ahead if the teardown runs past your expected timeline, so pickup or a swap can be rescheduled before the rental period quietly runs out.
That last point gets skipped a lot. Don’t assume the truck just shows up whenever you’re ready. A quick call locks in the date and keeps the project moving. Green Star’s professional team is known for quick responses when you need to adjust a pickup, so use that.
Comparing Dumpster Options for Shed Teardown Debris
Matching dumpster size to debris weight
Not all shed debris weighs the same, and that’s the whole game here. A pile of splintered 2x4s is light and bulky. A slab of concrete footing is small and brutally heavy. Picking a dumpster by debris weight, not just shed square footage, keeps you from overpaying or getting hit with overage fees.
Here’s a quick breakdown to work from:
| Dumpster size | Best for | Weight included | Price |
|---|---|---|---|
| 10 yard lowboy | Concrete pads, dirt, heavy foundation material | Flat rate, no weight tiers | $600 flat |
| 15 yard | Small wood-frame sheds, light framing debris | 1 ton included | $550, $95/extra ton |
| 20 yard | Medium sheds with roofing and siding combined | 2 tons included | $585, $95/extra ton |
| 30 yard | Multiple sheds, or a shed plus yard cleanout | 3 tons included | $600, $95/extra ton |
The lowboy’s low-profile design is built for shoveling heavy loads like concrete and dirt without straining your back. Don’t put roofing or siding in it, save that weight capacity for the dense stuff. A 15 yard handles a standard 8×10 wood shed with ease. Go 20 yard once shingles and metal siding enter the mix, since those add weight fast. Every size listed here carries all-inclusive pricing, with fuel and environmental fees already baked in. Customers often mention the good rates compared to what they expected, and there’s no surprise line items at pickup.
Wrapping Up: Final Site Cleanup and Disposal
Final safety sweep of the site.
Before you call the job done, walk the footprint one more time. Old sheds shed nails, screws, and splinters everywhere, especially around where the floor joists sat. A magnetic sweeper covers the ground fast and catches what your eyes miss. Bare feet, lawn mowers, and pets all thank you for this step. Skip it, and you’ll be pulling nails out of a tire in three weeks.
Next, double check that your debris piles got sorted right. Wood, metal, and shingles shouldn’t share a pile if you want clean, cost-effective disposal. Mixed loads often mean higher weight fees once they hit the scale, so a few extra minutes of sorting now saves money at pickup.
Once the site’s clear and the bin is loaded, get it scheduled. Many providers run delivery and pickup Monday through Saturday, so plan around that rather than assuming a weekend swap. A quick phone call locks in the date and keeps the empty lot from turning into a dumping ground for neighbors’ spare lumber. Friendly drivers tend to make this part painless, and most homeowners say the rolloff process itself is the easy half of the job.
Finally, don’t panic if teardown ran long. Weather delays, stubborn foundations, it happens. Rentals typically include a set number of days, often around 10, with extra days billed at a small daily rate through a simple rental period extension. Asking for an extension is routine, not a hassle, and it beats rushing the cleanup just to hit a deadline.
One more thing worth knowing: eco-friendly disposal and recycling keeps usable wood and metal out of landfills whenever possible. Scrap lumber often gets reclaimed, and metal roofing or framing typically goes to a recycling stream instead of a dump. It’s a small detail, but it adds up across thousands of torn-down sheds every year.
Choosing between hauling debris yourself and paying for extra convenience really comes down to timeline, budget, and how much lifting you’re willing to do. It’s worth asking how quickly you need a container on-site, how long the project will realistically take, and whether a standard open-top size will hold everything or if an extension down the road makes more sense. Weighing those questions honestly, alongside a quick call to confirm rates and availability, tends to save far more hassle than guessing after the fact.